Installing Bee is easy as 123
With the latest Swarm releases, it became extremely easy to install and run a Bee node. There are several ways to do it, but probably one of the most elegant ways is to run your Bee node on a DappNode Raspberry Pi.
Using a Raspberry Pi makes running a Bee node cheap and reliable. With DappNode, installing Bee is a breeze.
Here are the minimum requirements of your Raspberry Pi for running a Bee node:
- Raspberry model: 4, 3B+
- Raspberry RAM: 8GB, 4GB
- Micro SD free space: 64 GB or more
- Connectivity to the Rpi
There are tons of reasons why you should install your Bee node as soon as possible, but these are the main two:
- Join the network early, start gathering data and connect to other nodes. In January, Swarm testnet incentives go live and the node will start to earn gBZZ.
- When Swarm 1.0 migrates to the Ethereum mainnet, the node will be fully functional, data-rich, and ready to start earning real BZZ from day one.
Of course, there are many other reasons:
- Being part of a revolution
- Supporting Swarm’s mission
- Enabling a Fair data economy
… but let’s focus on the task at hand and dive into the how-to!
Installing Bee in 1–2–3
It shouldn’t take more than an hour to get a Bee running. Without hiccups, it should take less than half an hour. If you need help, join our Bee Support channel or tune in to the open office hours (every second Thursday at 17:00 CET) for technical support directly by the dev team.
First, put your Raspberry Pi together according to the manual that came with the box. You will also need a USB keyboard and an HDMI cable, to connect your Raspberry Pi to a monitor.
Step 1: Install DAppNode on your Raspberry Pi
The first thing you need to do is to install DAppNode to your Raspberry Pi. This is a very simple process, and it is described here.
Step 2: Set up VPN Connection to your DAppNode
Step 2.1 — You will need a VPN connection for remote access to DAppNode. After finishing the DAppNode installation, you will see a QR code with a link to the VPN.
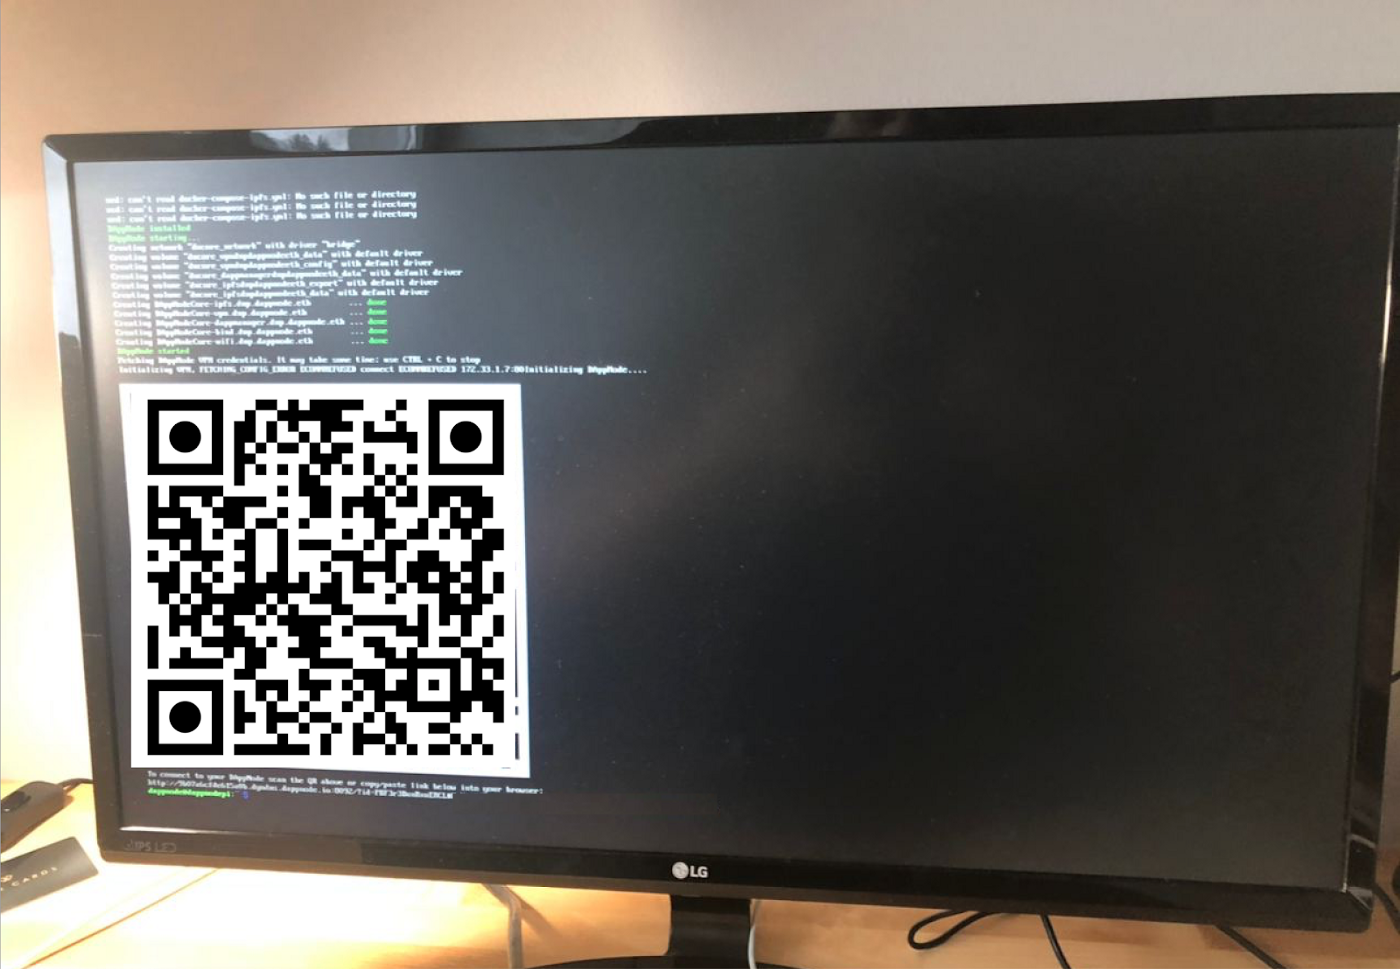
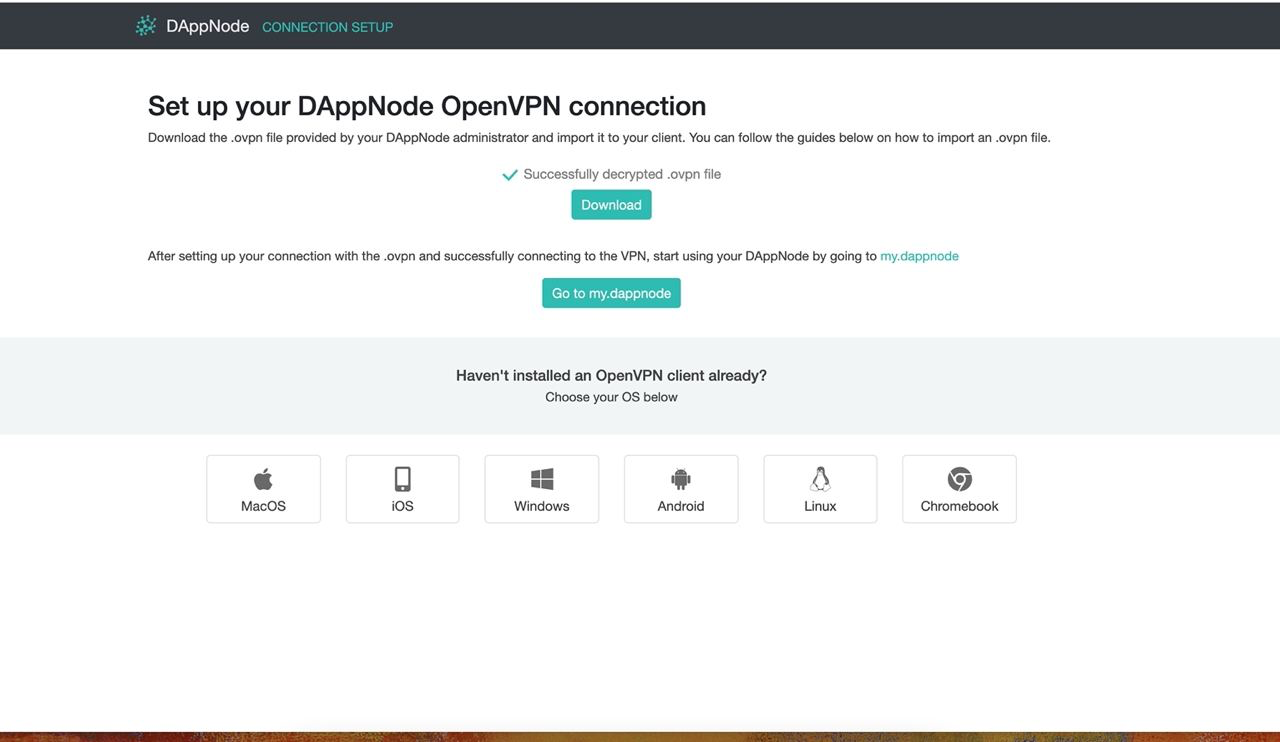
Step 2.2: Scan the QR code or just open the link in your browser and the DAppNode connection setup page should appear:
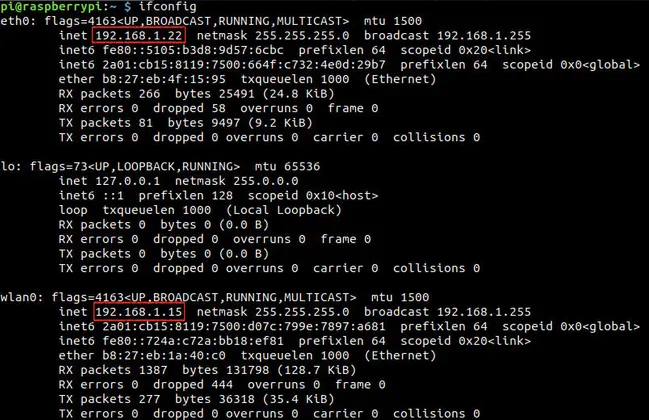
Step 2.3: If your Raspberry Pi is in the same network as your computer, you will need to change the IP address in the link provided. To find out your Raspberry Pi’s IP address, execute the following terminal command: “ifconfig”. You should see this:
Step 2.4: Now update your link with the right IP address
Step 2.5: Download .ovpn file
Step 2.6: Download a VPN client for your device and install it
Step 2.7: Double click on the .ovpn file and add this as a VPN profile
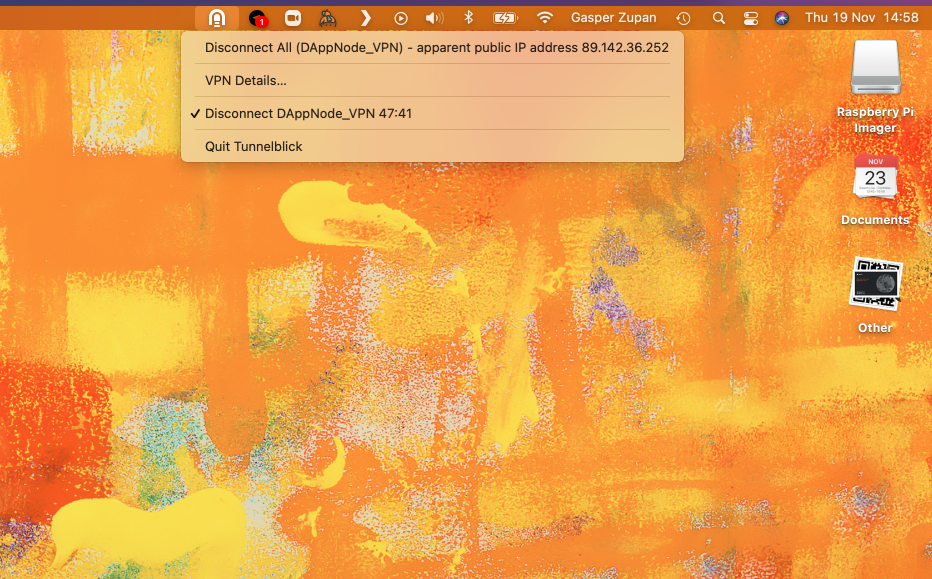
Step 2.8: Click on the Tunelblick icon and connect on VPN to DAppNode
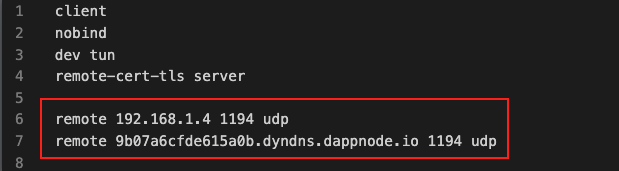
Step 2.9 (If your connection doesn’t work — part 1): you may need to edit your .ovpn file. To do so, open your .ovpn file in a .txt editor and change the order of lines 6 and 7. Put the local network IP above the remote network IP.
Step 2.10 (If your connection doesn’t work — part 2): Save the file and import it again as a new profile (before deleting the old profile).
From this point on, we assume your VPN is up and running and you are connected to DAppNode.
Step 3: Visit your DAppNode dashboard and install Bee
The last step is very straightforward. Similar to the Google App Store or iTunes, DAppNode has a DappStore. Click the DAppStore in the left sidebar. Search for the “Bee” module and click the “get” button. Now install your Bee node. Everything should be done automatically.
What to do next?
Your Bee node is now installed and running. However, there are still a few things you need to do to finish the process. You need to add some gBZZ to your ETH address. To add gBZZ to your ETH address follow this process:
- Go to the bzzaar via the link as provided in your bee logs (DAppnode/Packages/Bee/Logs -> https://bzz.ethswarm.org/?transaction=buy&amount=10&slippage=30&receiver=
) - Connect the Bzzaar to your MetaMask wallet on the Goerli test chain (upper right)
- Use the get g-eth button on the bzzaar to get g-eth on your node and metamask account
- Press the Exchange button to mint gBzz into the node’s account
- Approve the transaction in your MetaMask
- Wait a bit and the node should be able to proceed.
This concludes your Bee node installation. Your node will now start connecting to other nodes and data will be saved to your Raspberry Pi. You can check the balance of your gBZZ here, and your earned gBZZ cheques here.
For more information on how to maintain your Bee node or help with installing please visit the open office hours and get help directly from our dev team. You can also join the Bee Support channel or the DAppNode Swarm Support channel on Discord.
Discussions about Swarm can be found on Reddit.
All tech support and other channels have moved to Discord!
Please feel free to reach out via info@ethswarm.org
Join the newsletter! .